Welcome to the Vexa AI User Guide! This document is designed to help users understand and make the most of the Vexa features included users you to leverage AI for various tasks, from content creation to automation. Let’s dive in!

In Vexa AI you can create a chatbot template trained with specific knowledge on a particular topic. You can follow the steps below.

Creating a new Chatbot template

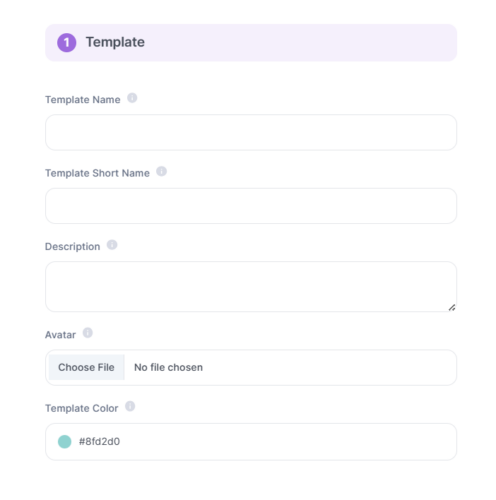
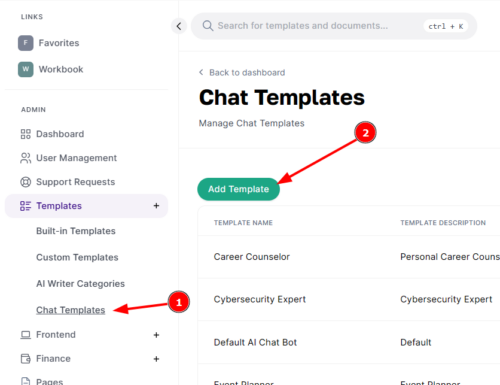
  1. Click the Add Template button on the Templates > Chat Templates page on your MagicAI dashboard.
  2. Enter the details of your chatbot template.
  3. Enter the personality details of your chatbot template.
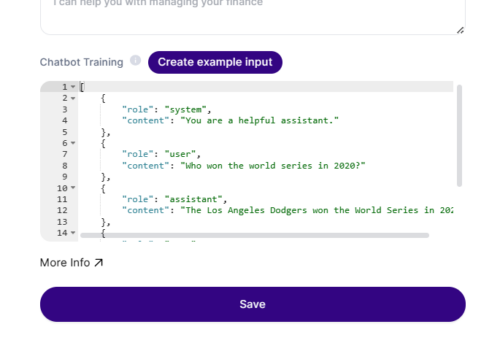
  4. In the Chatbot Training section, you can train your chatbot with the custom data you enter. You have to enter the data in JSON format. You can add a sample set of data by clicking the Create example input button.

    There are 3 different roles you can use when training your chatbot: UserAssistant and System.
    1. User: The User role is responsible for the human input or messages in the conversation. Users interact with ChatGPT by asking questions, making requests, or providing prompts. They initiate the conversation and provide context for the Assistant to generate relevant replies.
    2. Assistant: The Assistant role represents the language model (e.g., ChatGPT) that generates responses based on user messages. It uses its training on vast amounts of text data to understand the user’s input, generate coherent and relevant responses, and maintain the conversation flow. The Assistant aims to assist, provide information, and engage in conversation with the user.
    3. System: The System role involves instructions or guidance given to the Assistant to influence its behavior during the conversation. System messages are introduced by external systems or rules and are not based on user input. They serve to provide instructions, clarify context, or guide the Assistant’s responses. System messages help steer the conversation or modify the Assistant’s behavior to achieve desired outcomes.

    By assigning these roles, GPT empowers interactive and dynamic conversations where users effectively communicate their intentions. The Assistant generates meaningful responses, while the System seamlessly provides additional context or guidance as required.

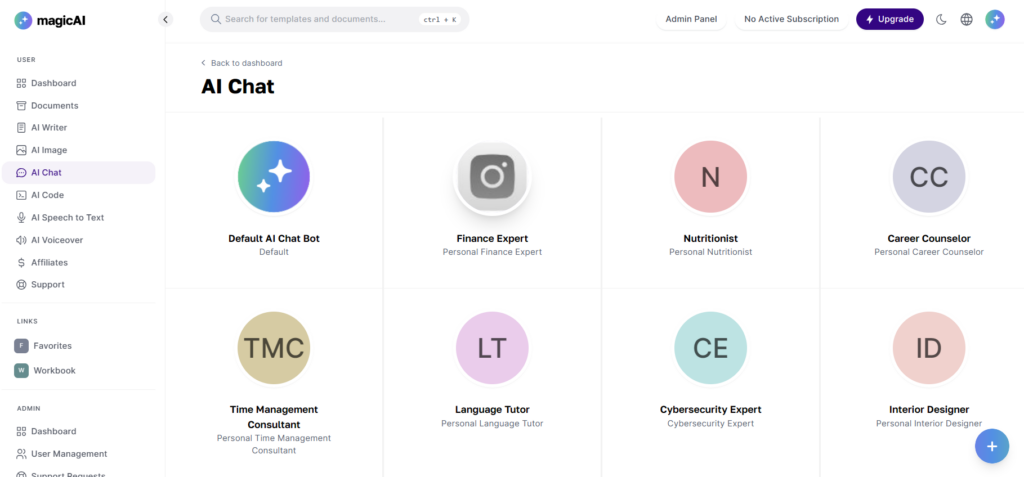
You can access the chatbot template you created via the AI Chat page.

Things to Pay Attention

  1. Make sure you enter training data in a valid JSON format. (When you click on the Create example input button, the data returned is in a valid JSON format.)
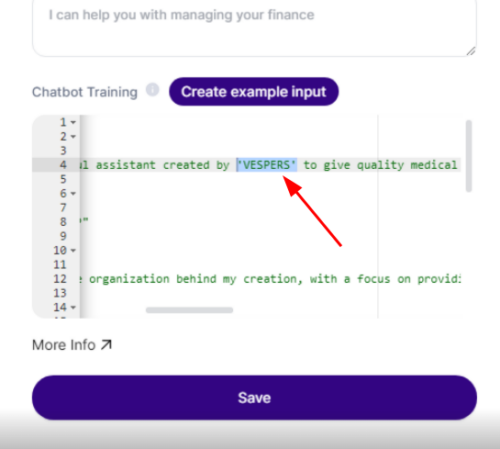
  2. Enter words like company names or group names in quotation marks. e.g., ‘MagicAI Corp.’ 
    Note: Do not use double quotation marks ( ” ), use single quotation marks ( ‘ ). Using (  ) will cause conflict in the JSON format.

Team Members

The Team Members feature enhances collaboration within the platform by allowing users to invite others to join their team. This documentation provides guidance for both administrators and users on how to utilize this feature effectively.

For Administrators

  1. Adding a Pricing Plan:
    • Administrators are responsible for adding a pricing plan that supports team members. This plan should include features and pricing structures that accommodate team collaboration.
  2. Adjusting Available Seats:
    • When creating or editing a pricing plan, administrators have the flexibility to change the number of available seats. This allows them to tailor the plan to different team sizes and subscription levels.

For Users

  1. Inviting Team Members:
    • Team managers, identified by their administrative privileges, can invite other users to join their team for collaboration.
    • To invite team members, the team manager should navigate to the designated section within their account settings or dashboard.
    • Input the email addresses of the individuals they wish to invite and send out invitations.
    • Invited team members will receive an email notification with instructions on how to accept the invitation.
  2. Accepting Invitations:
    • Invited team members will receive an email containing the invitation link.
    • Upon clicking the invitation link, team members will be directed to the platform’s registration or login page.
    • After logging in or completing the registration process, the invited user will be automatically added to the team as a member.
  3. Usage of Team Manager’s Credits:
    • Invited team members will utilize the credits or resources allocated to the team manager’s account.
    • This ensures that team members can collaborate seamlessly without the need for individual credit management.
    • Team managers should monitor the usage of credits to ensure efficient resource allocation within the team.

Conclusion

The Team Members feature facilitates seamless collaboration within the platform by allowing administrators to create team-friendly pricing plans and enabling team managers to invite members for collaboration. By leveraging this feature, users can enhance productivity and streamline workflows within their teams.

AI Social Media Setup

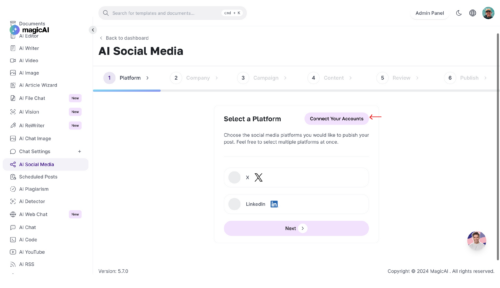
Step 1: Connecting Social Media Platforms

Each user can connect the social media platforms they need for scheduling posts. Currently, we support Twitter and LinkedIn.

Connecting LinkedIn

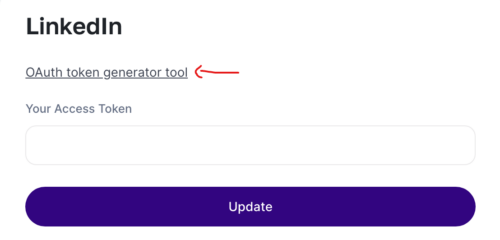
  1. Click on the OAuth token generator tool link.
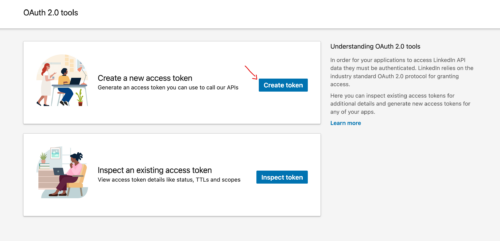
  2. Generate an OAuth token by creating a new access token in the “Create a new access token” menu after setting up your app.
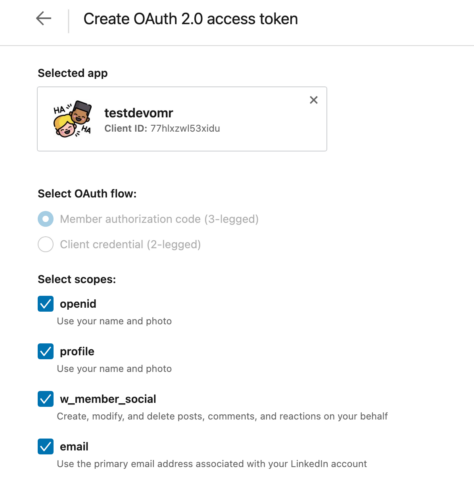
  3. Select the following scopes:
  • openid (Use your name and photo)
  • profile (Use your name and photo)
  • w_member_social (Create, modify, and delete posts, comments, and reactions on your behalf)
  • email (Use the primary email address associated with your LinkedIn account)
  1. Click on the “Request access token” button.
    • If you encounter issues with token generation, try using a different browser.
  2. Copy the generated token and paste it on the LinkedIn connect page.

Connecting Twitter

  1. Follow the steps outlined here to obtain the necessary credentials:
  • API Key
  • API Key Secret
  • Bearer Token
  • Access Token
  • Access Token Secret
  • Client ID


Step 2: Setting Brand Voice

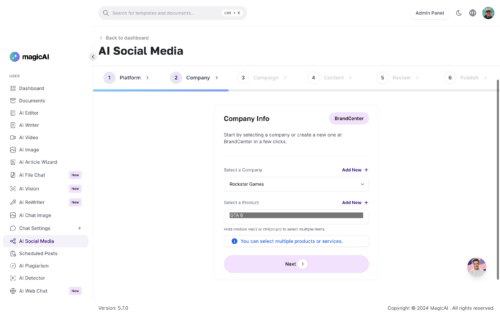
After connecting your platforms, ensure to enter your company and service/product information in the brand voice page. This will personalize AI-generated social media content.

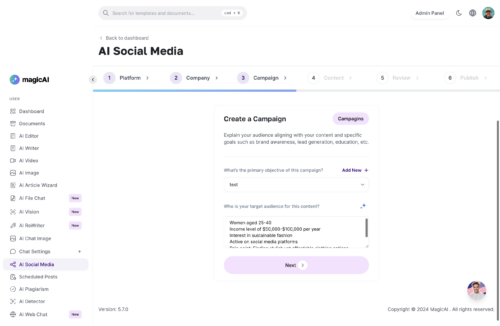
Step 3: Creating Campaigns

  1. Navigate to the campaign creation section.
  2. Define your campaign objectives, target audience, and content themes.

Step 4: Reviewing Posts

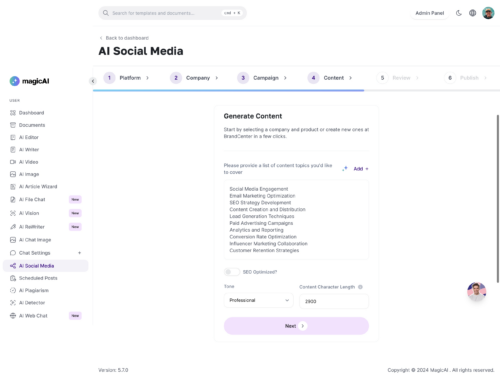
Before scheduling, review the example posts generated by the AI to ensure they align with your brand voice and objectives.

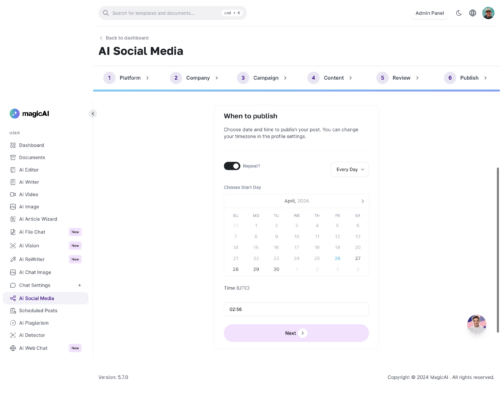
Step 5: Scheduling Posts

  1. Set schedules for posting, including daily, weekly, and monthly frequencies.
  2. Adjust posting times based on the appropriate time zone. Note that some time zones may have a variation of up to -3 hours.

That’s it! You’re now ready to utilize the AI social media extension effectively.

Vexa AI: SEO Tools User Guide

Getting Started with Vexa AI’s SEO Tools

Maximize your content’s visibility with Vexa AI’s powerful SEO Tools. Follow this guide to set up and utilize the tools effectively.

1. Set Up Serper API

  • Navigate to “Serper API” in the left menu under Settings.
  • Enter your Serper API key to activate the SEO Tools.

2. Use Cases

a. Keyword Suggestions with Article Wizard

  • Activate the “Keyword Suggestions” feature to generate SEO-optimized keywords based on the latest Google searches.
  • Access this functionality directly within the Article Wizard interface to enhance your content’s search engine visibility.

b. Search Questions for Article Wizard

  • Enable “Search Questions” to receive suggestions based on recent Google searches during the outline stage of your article creation.
  • Access this feature within the Article Wizard to create content that aligns with current user queries.

c. Site Meta Optimization

  • Optimize your website’s meta title, description, and keywords using the “Site Meta Optimization” feature.
  • In General Settings, click the AI icon to generate and apply SEO-optimized meta information automatically.

d. Blog Post SEO Enhancement

  • Enhance your blog posts’ SEO by optimizing meta fields based on the post title and recent search trends.
  • Use the AI-driven tool to generate SEO-enhanced fields effortlessly for each blog post.

3. What’s Next? Stay tuned for more exciting tools and features as Vexa AI continues to evolve. Expect ongoing enhancements to further boost your content strategy and online presence, ensuring your business remains at the forefront of digital visibility.

Install WordPress REST API Authentication Plugin


  1. Navigate to WordPress Admin Dashboard:
    • Log in to your WordPress admin dashboard using your credentials.

  2. Install the Plugin:
    • In the WordPress dashboard, navigate to ‘Plugins’ > ‘Add New’.
    • Search for ‘WordPress REST API Authentication’ in the plugin search bar.
    • Click on ‘Install Now’ and then ‘Activate’ to activate the plugin.
Create a Bucket

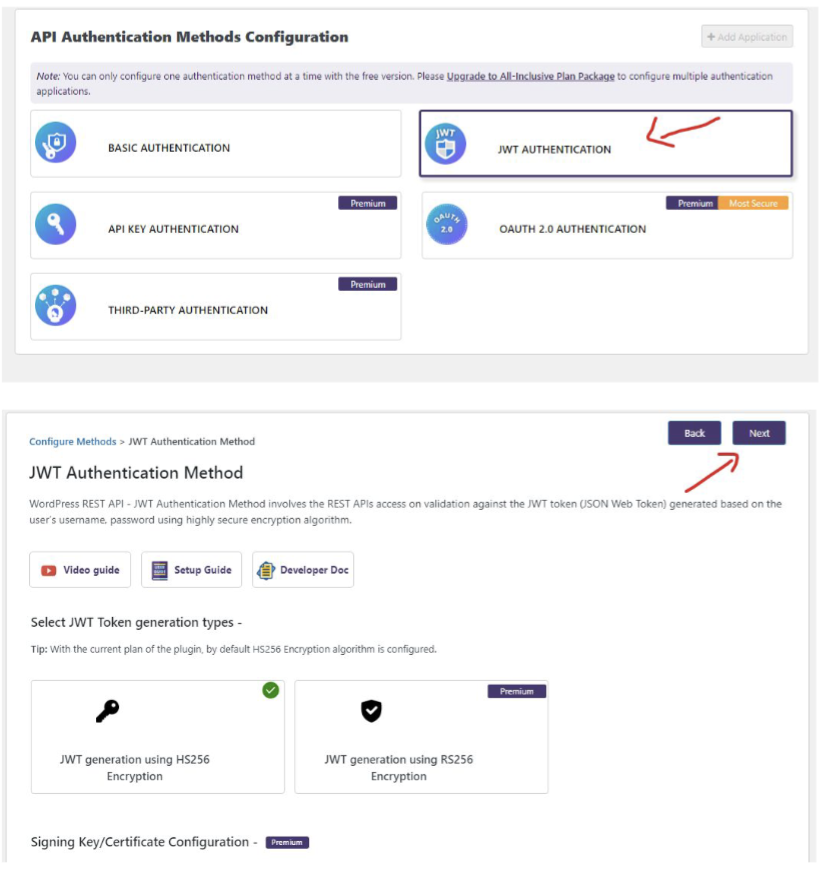
After installation, make sure that JWT Authentication is activated in the plugin settings.Two-factor authentication must be disabled on your WordPress site.

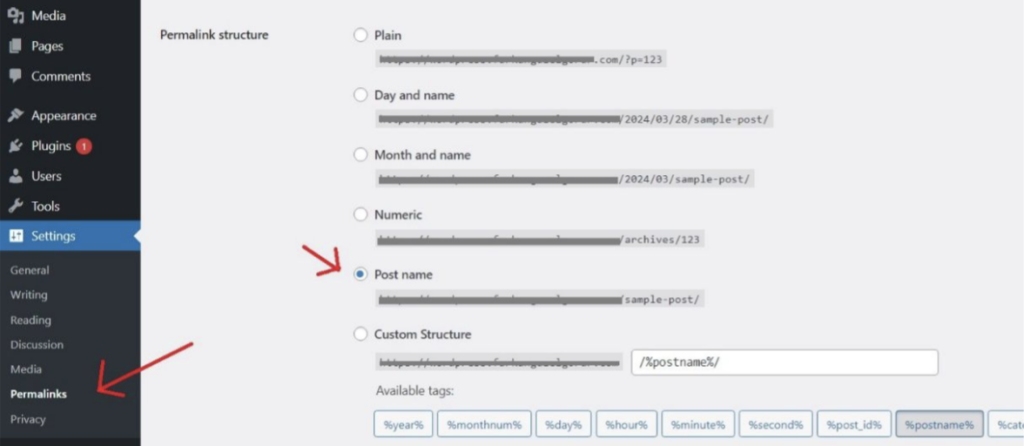
From the panel, go to Settings -> Permalinks and select the ‘postname’ option

Permalink Options

Once the installation is complete, follow the steps below from the customization menu and then press the finish button.

API Configuration
API Configuration

WordPress & Vexa AI Integration

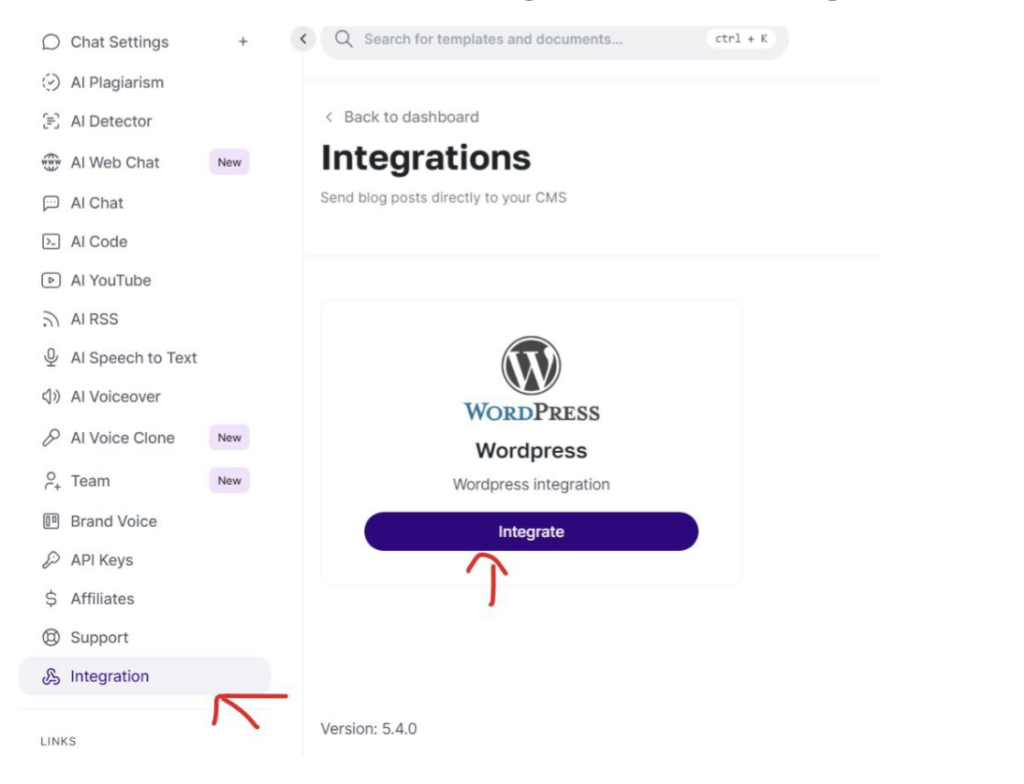
Now, you should see a new menu on user dashboard called “Integrations”. Navigate to Integrations page and follow on-screen instructions to add your WordPress Credentials (Domain, User and Password) to complete the integration.

Integration

Share & Publish Content


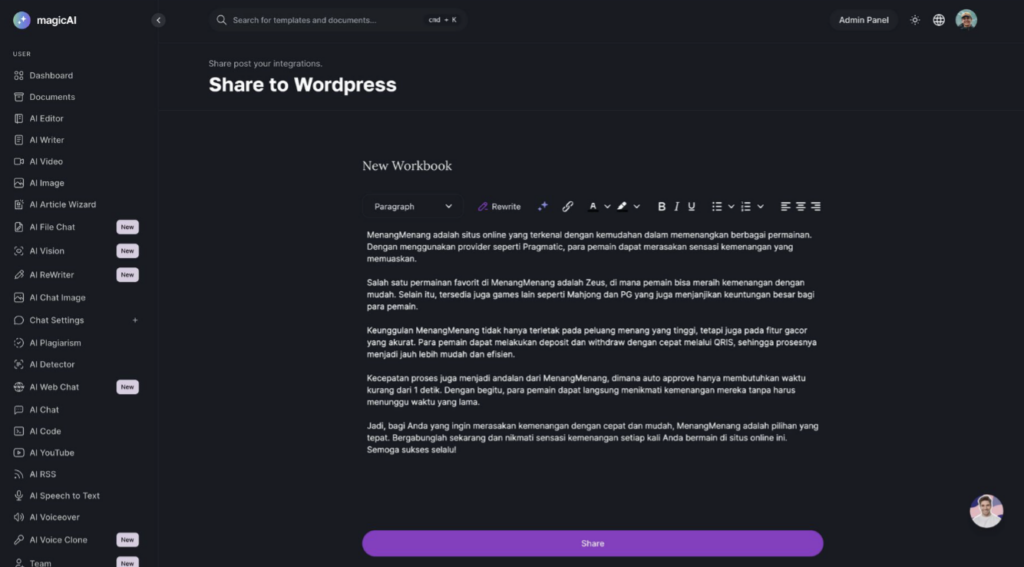
Access your documents page within Vexa AI, where you’ll find a “Publish” button located at the top right corner of your screen. Click on this button to initiate the publishing process of your document onto WordPress.

Share Content